Dividing tulip bulbs will allow you to plant once and have them last for years, maybe even a lifetime!
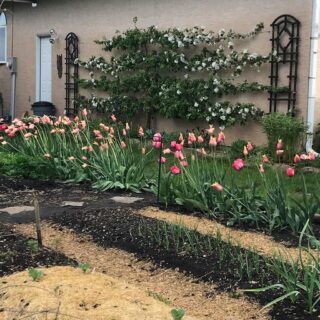
I bought and planted these tulips about 25 years ago. Yup, you read that right. 25 years and going strong. It has been a very long time, but I think this is the tulip that I have. My original plan was to create a patch of tulips in the vegetable garden that was intended just for cutting flowers. I reasoned that if I treated them as vegetables I wouldn’t mind cutting them to bring into the house. I was wrong. Not once in 25 years have I had the heart to cut a bouquet of tulips from my garden. I enjoy their early spring color too much right where they are – in the garden. I wonder sometimes how many I would need to feel like I have enough of these beauties that I could cut a bunch out to bring into the house. 200? 300? A lot I think.
A lot of people do not know that tulips can be saved year after year, or how to do it. Many people plant them and then are disappointed when a few years later the blooms begin to wane even if the plants continue to come up in the garden. Overcrowding is the answer.
Like garlic bulbs, tulip bulbs are placed into the ground as one single bulb, and much like a garlic bulb (though not in exactly the same manner) one eventually turns into many. Your single large tulip bulb grows little baby bulbs around it every year. This is how tulips, like other bulbs, reproduce. If left entirely alone many varieties will begin to get overly crowded and they will choke each other out, with the result being smaller blooms or no blooms at all. The answer is to divide those tulip bulbs.

About every three years I divide my tulip bulbs, digging them up in the fall, sorting them into sizes, discarding the very small ones. I then replant the largest bulbs and rehome many of the medium sized ones.
Over the decades that I have had these bulbs I have likely divided them 10 or more times. I don’t remember but I likely bought around 2 or 3 dozen bulbs to begin with and I probably replant 150 or more every time I do it. The time to do it is when each plant has become a small clump, many bunches of leaves with only one flowering stalk.
There are two methods to do this. One, the one I tried with my first little tulip patch, is to ‘heel them in’. This requires digging them up once they have flowered and then replanting them in shallow rows lying down on a 45° angle, until the foliage has dried up and died off. The reason that one might do this is that once the flower is done and deadheaded you need to leave them in the ground to mature. This allows the energy from the leaves to go back down into the bulb so that they can do it all over again next year. The problem is, it’s not an attractive process. You have a lot of dead looking foliage in your garden for a fair bit of time. So, formal gardeners would find a patch of dirt outside of the flower bed to heel them in. This would allow the bulbs to mature for next year while allowing the gardener to plant something more attractive in their place. This works, but it is a pain in the butt. I like easy gardening. I also don’t like having tulips pop up in random spots of the veggie garden when I’ve missed one or two in the digging up process.
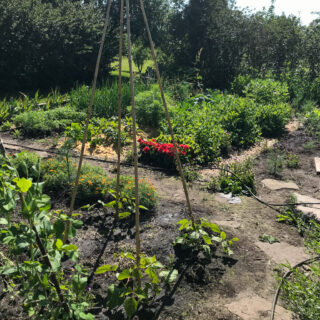
The second method, which is what I do now, is to leave them where they are for the summer and overplant something around them that will grow tall enough to hide that ugly browning foliage for the rest of the season. This year I have planted nasturtium in between the tulips, last year it was French marigolds. This will hide the ugly and also shade out many of the weeds that are hard to get at between the tulip stalks. Double duty for the win!
This fall my tulip bulbs will need dividing so once the nasturtium has frozen, I will dig up the row of tulips, divide up the bulbs, add amendments to the soil and replant. Next year they will be back as strong and beautiful as ever.

This thrifty method will have you enjoying tulips for decades. Have you ever tried it? Let me know in the comments.